Category: Step by Step Instructions

Members of ONEvoiceFamily.com can see all of “Step by Step Instructions.”

  • Video Tutorials for Everyone

    Basic and Gold members receive, pre-installed access, in their dashboard to the following video tutorials:

    • The Dashboard
    • Posts vs. Pages
    • The Editor
    • Creating a New Post
    • Post Formats
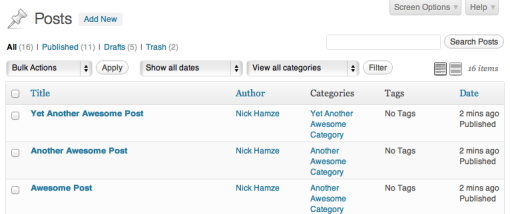
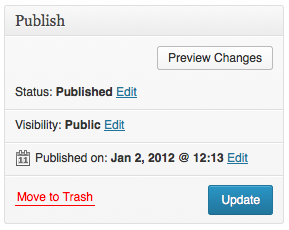
    • Edit an Existing Post
    • Using Categories and Tags
    • Creating and Editing Pages
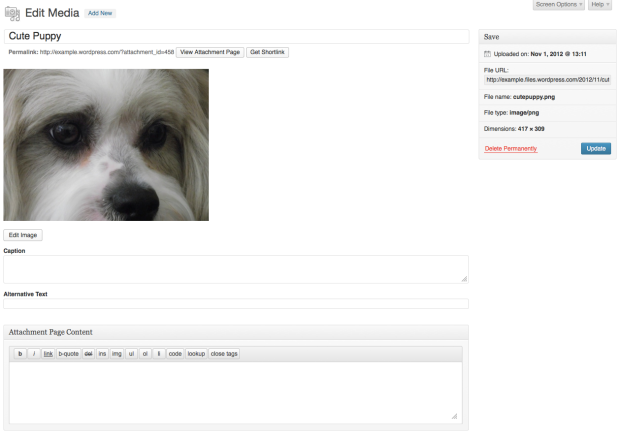
    • Add Photos and Images
    • How to Embed Video
    • Using the Media Library
    • Managing Comments
    • Creating Links
    • Changing the Theme
    • Adding Widgets
    • Custom Menus
    • Installing Plugins
    • Adding New Users
    • Useful Tools
    • Settings & Configuration

    Each are professional and clearly understood.  For anyone needing assistance with how to build a WordPress website, this is the place to start.  We have them made upon every major WordPress release.  To give you an idea of how often WordPress releases upgraded, there could easily be six major releases in any given year!

    [s2If !current_user_can(access_s2member_level0)]Welcome Guest, You will need to [footer_loginout] to view more content on this page.  If you’re not yet a member let’s get started.[/s2If]

    [s2If is_user_logged_in()][s2Get constant=”S2MEMBER_CURRENT_USER_FIRST_NAME” /] [s2Get constant=”S2MEMBER_CURRENT_USER_LAST_NAME” /], To view videos, go to your dashboard: dashboard>>video tutorials  It will be at or near the last item on the left hand menu.[/s2If]

  • Free Image Editing Software/Tools to Edit your Website Images

    Free Image Editing Software/Tools to Edit your Website Images


    Although we own editing suites for videos, pictures, photography and other images, we choose to use the above online image editor to create many of our more basic images (e.g. create logos with transparent backgrounds, posters, advertising banners, remove/replace image backgrounds, and other basic functions)!  It’s called Pixlr Editor, from Autodesk®; it’s fast, powerful, functions/operates much like PhotoShop® software from Adobe, and it’s free.  You don’t have to register to use it; it’s online and powerful enough to create/edit/save/download stunning images.

    With their written permission, and for your convenience, we provide this valuable resource free to anyone; even if you don’t subscribe to either of our services!  This tool is powerful but if for some reason you need more, try their premium tools.

    Below are some tutorials to help learn how to use Pixlr:

    http://vimeo.com/68925405

    1vfcb2360x80B

    Free PhotoShop® software from Adobe

  • Facebook Integration

    Facebook Integration

    If you would like your Facebook Page more completely integrated with your website, you will need to give us “Content Creator” permission on your *Facebook Page. From that point, we (ONEvoiceFamily) will do some programming in the background.

    *NOTE: Free and Pro accounts must follow these steps because you do not have access to the Facebook integration part of your website.  At your request, we are happy to make this change for you.  There is no charge.   Follow these steps and we’ll be happy to complete the setup once notified.

    *NOTE: Gold, Custom and BusinessINaBox (our newest offering for certain industries) accounts do not have to add us to your Facebook Page unless you wish for us to make the integration for you.  If so, please follow these steps and we’ll be happy to complete the setup once notified.

    Instructions:

    1

    First, while logged into Facebook, navigate to your Facebook Page. In the upper right corner you will see an ‘edit’ button. Under the ‘edit’ button, select ‘Manage Admin Roles’.

    facebookaddustoadvertise1

    2

    Second, select ‘Add Another Admin’.

    facebookaddustoadvertise3

    3

    Last, add your site admin (David Roberts) as ‘Content Creator’.

    facebookaddustoadvertise4


    When completed, notify us so we will be aware to make the changes to your ONEvoiceFamily account.

  • Insert Photos and Videos (working with media- audio, video, pdf, etc.)

    Insert Photos and Videos (working with media- audio, video, pdf, etc.)

    If after studying this topic you still have questions, please go to CUSTOMER SUPPORT FORUM to ask your question.

    In addition to uploading media files directly to your blog’s media library, you can also upload, manage, and insert images, audio (we suggest embedding audio files) and video (we suggest embedding video files) directly from your post or page editing screen using the Add Media button.

    With the Add Media button, you can easily add an image into a post or page by dragging and dropping your media files into the pop-up box.

    You may add audio and video from your computer to your ONEvoiceFamily.com blog but please read this post before proceeding.

    If you wish to upload audio files directly from your computer, you may but ONEvoiceFamily.com is not a cloud service built for streaming.  Even though we have no limits on many of our accounts, we will not allow one customer to damage or slow the service of the entire community.

    To link to audio and video files hosted elsewhere without storing them in your Media Library insert the appropriate code into the page or post.  We recommend embedding these files. For information on embedding videos from other hosting sites/services (e.g. YouTube, DailyMotion, Vimeo, etc.).

    Lastly, you can also use this button to create download links to documents (PDF, Microsoft Word document, etc.). When inserting a document link into your page or post, make sure to select the Media File option from the Attachment Display Settings drop down menu:

    By clicking Add New on the Media menu you can upload images, audio files, videos and other files to your Media Library without having to start a new post.

    The Add New screen lists your allowed file types, allows you to select files to upload, and shows your remaining upload space.

    upload-new-media

    Simply drag and drop your files into the box that appears, or click Select Files to choose a file from your computer to upload. Please keep in mind that the drag and drop uploader only works in browsers with HTML5 upload support such as the latest versions of Chrome, Firefox, or Safari. Other browsers will still show the Select Files button or the basic browser uploader form.

    When a file has finished uploading, you will see a Edit link on the right.

    Clicking on the Edit link will allow you to edit the Title, Alternate Text, Caption, and Attachment Page Content for a file. It will also provide you with the URL of the file. Here’s an example of the options for an image upload:

  • Adding and Editing a Page

    Adding and Editing a Page

    If after studying this topic you still have questions, please go to CUSTOMER SUPPORT FORUM to ask your question.

    The Page Screen is where you create new pages or edit existing pages. The default page screen (Pages → Add New) will look similar to the following image:

    add_new_page

    You will notice in the screenshot that the title of the screen is Add New Page. If you were editing a previous page, the title would be Edit Page, but everything else on the screen is essentially the same.

    The screen is broken down into modules, each with their own purpose. The three most important parts of the page screen are the Title of your page, the Editor (where you type your content), and the Publish module.

    The Publish module is very important because it’s where you save your pages, publish them, and preview changes. The module will change depending on the status of your page. Here is the default Publish module:

    publish_page_new

    After publishing a page, the module will look like this:

    publish_page_update

    Notice how the Save Draft button has been removed and the Publish button has been replaced with Update.

    Other documentation pages will go into more detail on each of the modules and different areas. See Related in the table of contents area on this page.

    Configuring the Screen

    The Screen Options pull down can be found at the top right of the screen. When you click on Screen Options you will see a set of modules that can be set to show or hide. To hide one of the modules from showing on the screen, just check the box next to it.

  • Embedding a YouTube Video

    Embedding a YouTube Video

    If after studying this topic you still have questions, please go to CUSTOMER SUPPORT FORUM to ask your question.

    Embedding a YouTube video with a URL

    To quickly embed a YouTube video, simply copy the video’s URL from your web browser’s address bar while viewing the video:

    Paste it on a line by itself in your post/page editor (make sure that it is not hyperlinked):

    We take care of the rest!


    Troubleshooting

    • Make sure the YouTube link is not hyperlinked. If the URL is shown in your theme’s link color (as the second line in the screenshot below), then it is hyperlinked. Simply select the whole URL and click the “Unlink” icon on your Visual Editor toolbar.

      Once the URL is unlinked, you will see the link text in black.
    • Make sure to place the YouTube URL or shortcode on its own line. This means there should be no character or whitespace before or after the URL/shortcode.

    Alternatively, to change the size and other attributes of the video, you may use the html code provided on YouTube.com.  First, copy the code.  Second, paste into the editor as TEXT (notice the upper right corner where there are two tabs (Visual and Text).