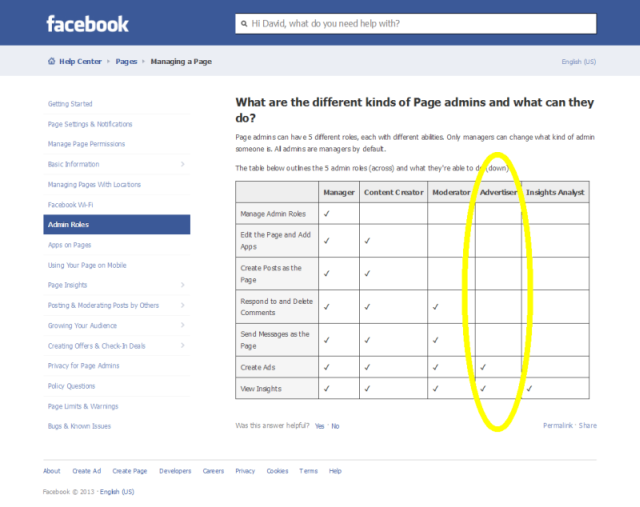
If you would like your Facebook Page more completely integrated with your website, you will need to give us “Content Creator” permission on your *Facebook Page. From that point, we (ONEvoiceFamily) will do some programming in the background.
*NOTE: Free and Pro accounts must follow these steps because you do not have access to the Facebook integration part of your website. At your request, we are happy to make this change for you. There is no charge. Follow these steps and we’ll be happy to complete the setup once notified.
*NOTE: Gold, Custom and BusinessINaBox (our newest offering for certain industries) accounts do not have to add us to your Facebook Page unless you wish for us to make the integration for you. If so, please follow these steps and we’ll be happy to complete the setup once notified.
Instructions:
1
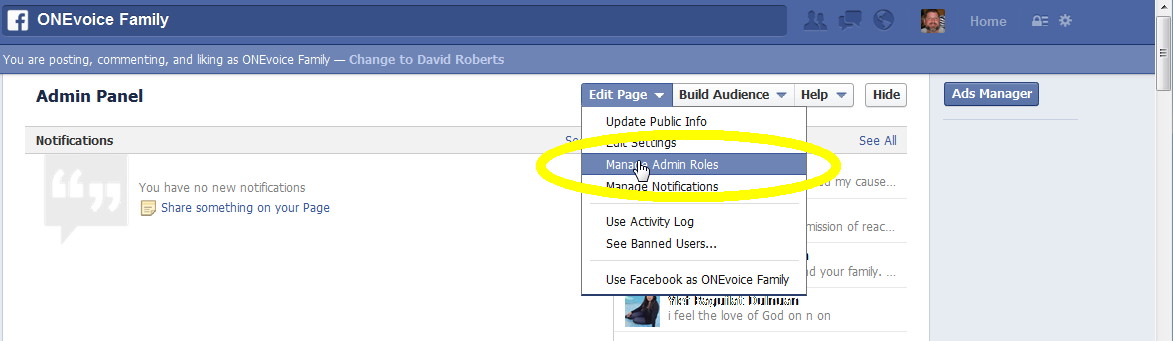
First, while logged into Facebook, navigate to your Facebook Page. In the upper right corner you will see an ‘edit’ button. Under the ‘edit’ button, select ‘Manage Admin Roles’.
2
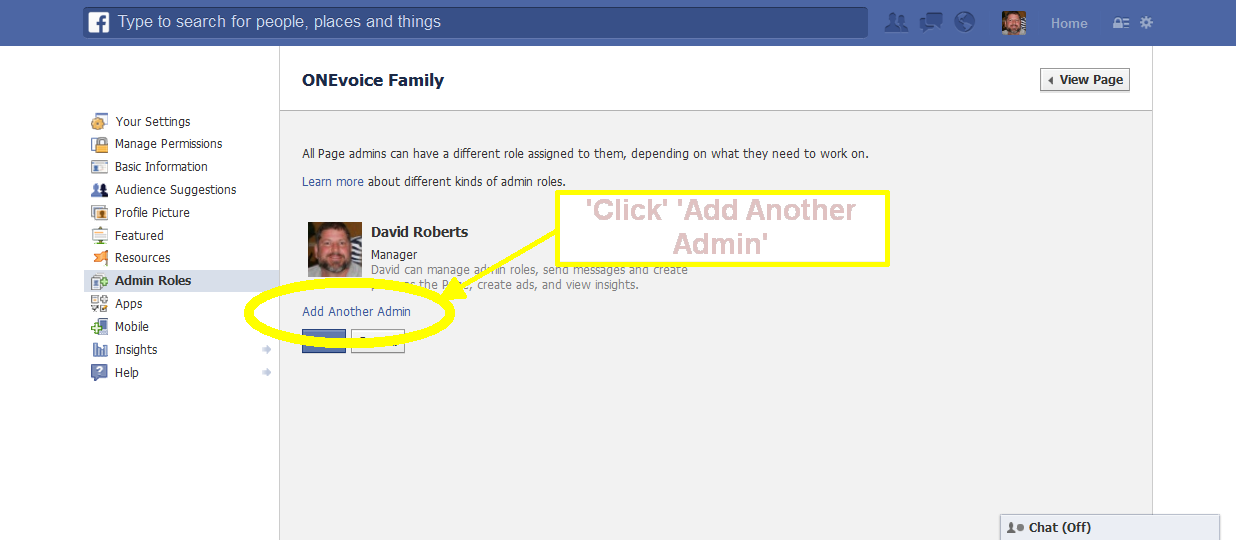
Second, select ‘Add Another Admin’.
3
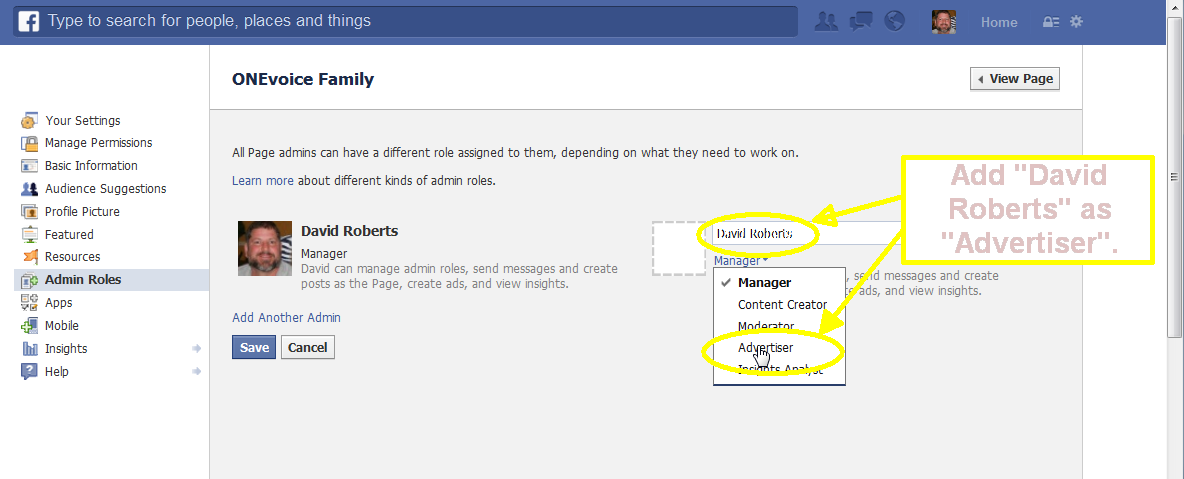
Last, add your site admin (David Roberts) as ‘Content Creator’.
When completed, notify us so we will be aware to make the changes to your ONEvoiceFamily account.
If after studying this topic you still have questions, please go to CUSTOMER SUPPORT FORUM to ask your question.
You can schedule blog posts to automatically publish themselves at any time in the future. If you want to remove an already published post and automatically republish it at a specific time/date in the future, the directions are the same:
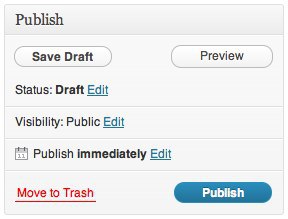
In the Publish module to the right of the post editor, click the blue Edit link next to Publishimmediately.
Set the future date/time when you want the post to publish itself and click OK. To schedule a post in the PM, you will need to use the 24-hour clock. For example, 1:00 PM would read as 13:00 in the Schedule a Post module. The time will be based on your location settings in your Settings -> General page.
Instead of Publish immediately, it will now say Schedule for: followed by the date and time you specified, and the button has changed from Publish to Schedule.
Click Schedule. Scheduled posts will be triggered by the first visit to your blog on or after the exact date/time you set. If you see that the scheduled time has come and gone and your post has not published, simply log out of ONEvoiceFamily.com and view your blog’s front page. Your visit should cause the post to appear.
Note: Sometimes you might want to backdate a post. For example, if you’ve just come back from a long trip, you might want to write a post for each day of your travels and have the post dates match the actual days you were away. To backdate a post, simply edit the date before you click Publish, as described above. In this case, the button will not change to Schedule.
Un-scheduling a Post
If you’ve scheduled a post to be published in the future, but changed your mind and want to publish it immediately, head back to the Edit Post page for your scheduled post.
In the Publish module, click on the “Edit” link next to the date for which you’ve scheduled your post:
Then, enter today’s date and time as your scheduled post time and click on “Ok.” When finished, click Publish and your post will be published immediately.
Troubleshooting Scheduled Posts
If your scheduled post does not appear, check the following:
Is your timezone correct in your Settings -> General page?
Did you save your post as a draft rather than schedule it? For the post to publish, you must click the Schedule button.
Has no one visited your blog yet? Try logging out of ONEvoiceFamily.com and visiting your blog’s front page.